Home › cPanel Tutorials › Setting-Up your Email Account in MS Outlook
Setting-Up your Email Account in MS Outlook
This tutorial will cover the steps on how to setup your email account in MS Outlook 2007 and 2010 only.
Step 1: Go to Account Settings
- The Account Settings button is found inside the “File” menu in MS Outlook 2010 while the Account Settings in 2007 is found under the “Tools” menu. (see image below)

- Please note that the image shown above is that of MS Outlook 2010.
Step 2: Click the “New” Button
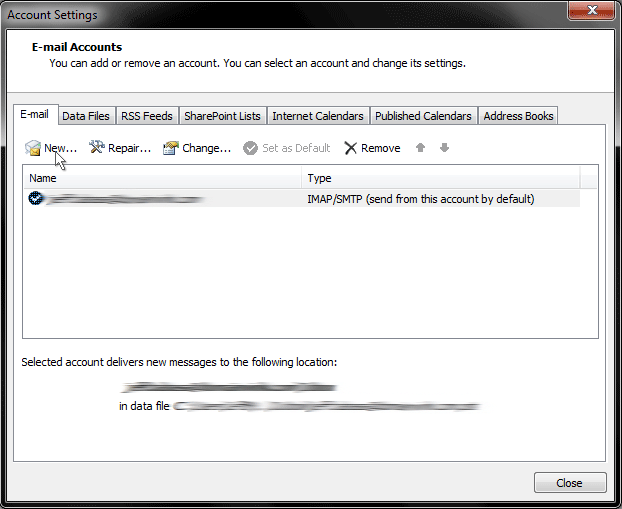
- The Account Settings window will pop-up after clicking the Account Settings button.
- Inside the Account Settings window, click the “New” button. (see image below)
Step 3: Choose “E-mail Account”
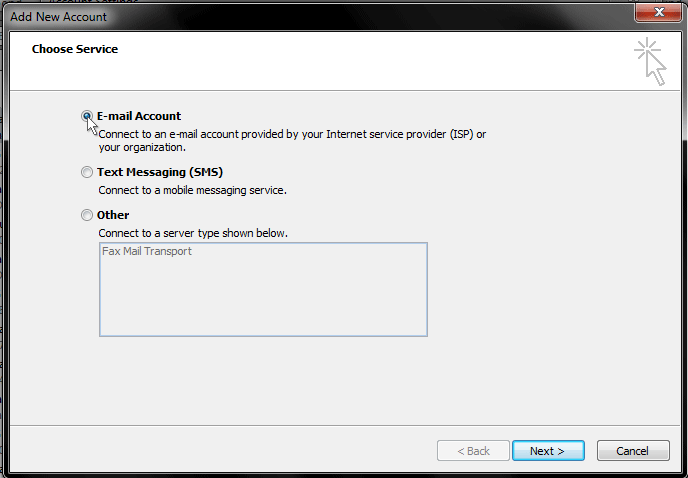
- Another window will pop-up after clicking the “New” button.
- Choose the “E-mail Account” option then click the “Next” button. (see image below)
Step 4: Choose “Manually configure server settings or additional server types”
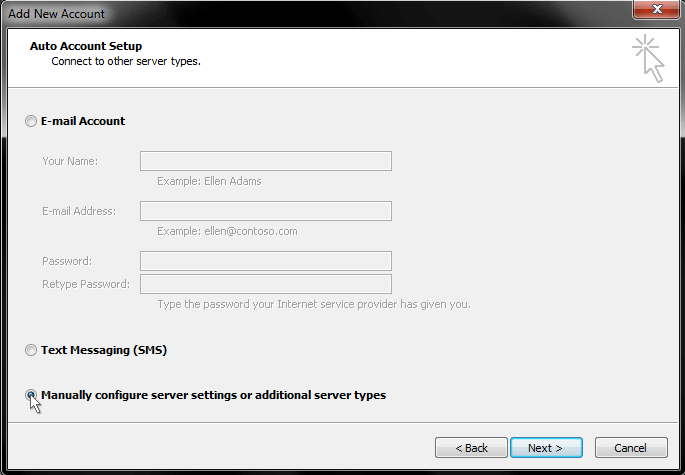
- From the choices given, choose “Manually configure server settings or additional server types”, and then click the “Next” button. (see image below)
Step 5: Choose “Internet E-mail”
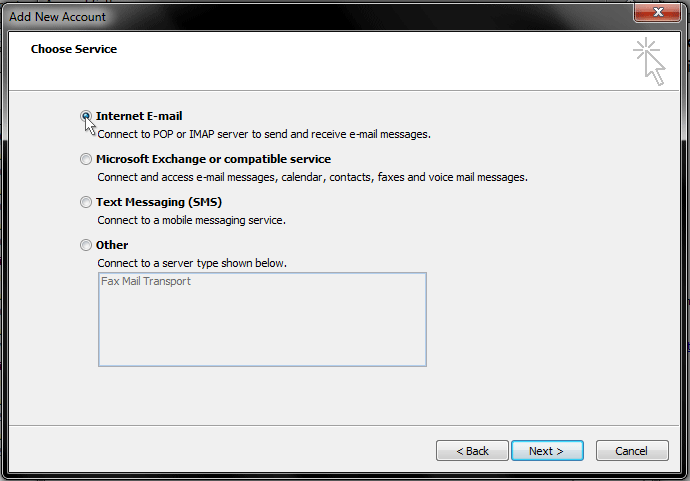
- Choose “Internet E-mail” from the choices then click the “Next” button. (see image below)
Step 6: Fill-Up the Form
- You will arrive in a window where you can now setup your email account. (see image below)
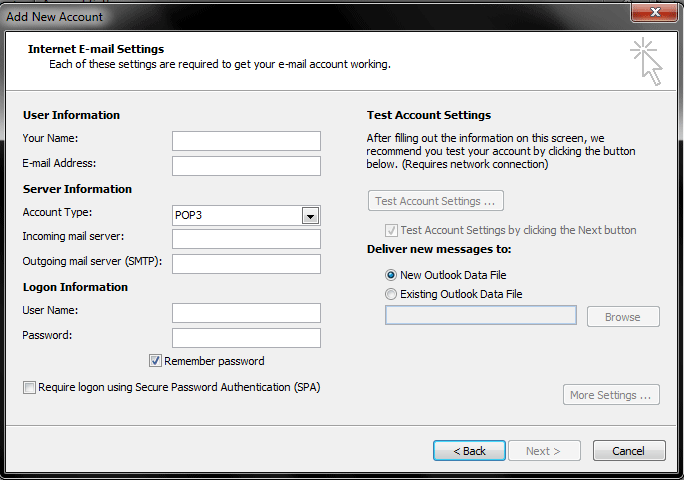
- Under “User Information”, you can use any name you want to show when sending emails, while in the e-mail address, use the email account you created inside cPanel.
- In the Server Information, you can choose from using POP3 or IMAP.
- In Incoming and Outgoing (SMTP) mail server, use the host name that we have provided you.
- In the Logon Information, use your email account’s email address as your username and your email account’s password in the password field.
- After you have finished this, click the “More Settings” button.
Step 7: Configure your Email Account’s Advanced Settings
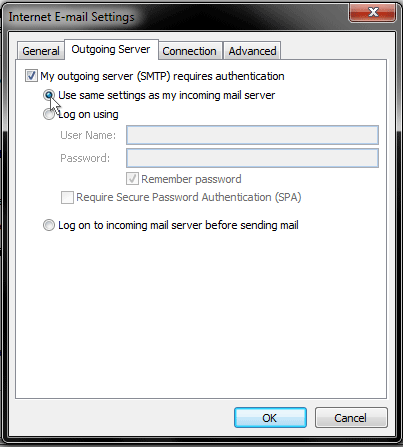
- Click the Outgoing Server and check the “My outgoing server (SMTP) requires authentication” then choose “Use same settings as my incoming mail server”. (see image below)
- Go to Advanced tab then change then either change the Outgoing Server (SMTP) Port to 26, or leave it at 25. As for the Incoming server (POP3 or IMAP), just leave it at it’s default port. (see image below)
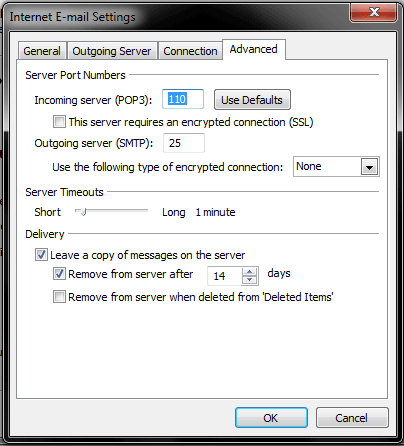
- Save your changes by clicking the “Ok” button.
Step 8: Test your Account Settings
- Click the “Test Account Settings” button.
- A pop-up window will appear where MS Outlook will try to login your Email Account as well as send test emails.
- After all these tests had checked-out, you can now close this window and proceed to finish your Account Settings.


